Troubleshooting Foam Problems: Diagnose and Fix Common Issues
Every flaw in latte art leaves a signature in the foam, and learning to read that signature is the fastest way to trace a problem back to its origin. The milk tells you what went wrong — through its texture, its sheen, its movement in the cup — if you know what to look for. What follows is a structured guide to the most common foam failures, their root causes, and the specific adjustments that resolve them.
Foam That Is Too Stiff or Dry
Stiff foam sits on top of the milk like a cap rather than integrating into the body of the liquid. When you swirl the pitcher, the foam resists movement, clumping instead of flowing. Poured into espresso, it lands in thick, shapeless blobs and refuses to be drawn into fine lines or symmetrical patterns.
The cause is almost always too much air introduced during the stretching phase, or air introduced too late in the steaming process when the milk is already too hot for proteins to properly encapsulate new bubbles. The resulting structure is coarse — a loose weave of large, dry bubbles rather than the tight, glossy grain of proper microfoam.
To fix this:
- Shorten your stretching window. Air incorporation should happen in the first two to four seconds of steaming, while the milk is still cold and the proteins are most capable of forming stable, fine-walled bubbles. Once the pitcher begins to feel warm to the touch, the stretching phase is over.
- Lower the steam tip slightly. If the tip sits too high at the surface, it pulls in large gulps of air. The goal is a faint, rhythmic hissing — not a roaring or sputtering sound. A position just barely below the milk’s surface draws in thin, controlled sips of air.
- Extend your polishing phase. After stretching, submerge the tip deeper and create a strong vortex to fold those bubbles into the body of the milk. Polishing is where coarse foam is woven into microfoam; cutting it short leaves the texture unfinished. For more detail on this critical phase, the Steaming Technique guide walks through the full sequence.
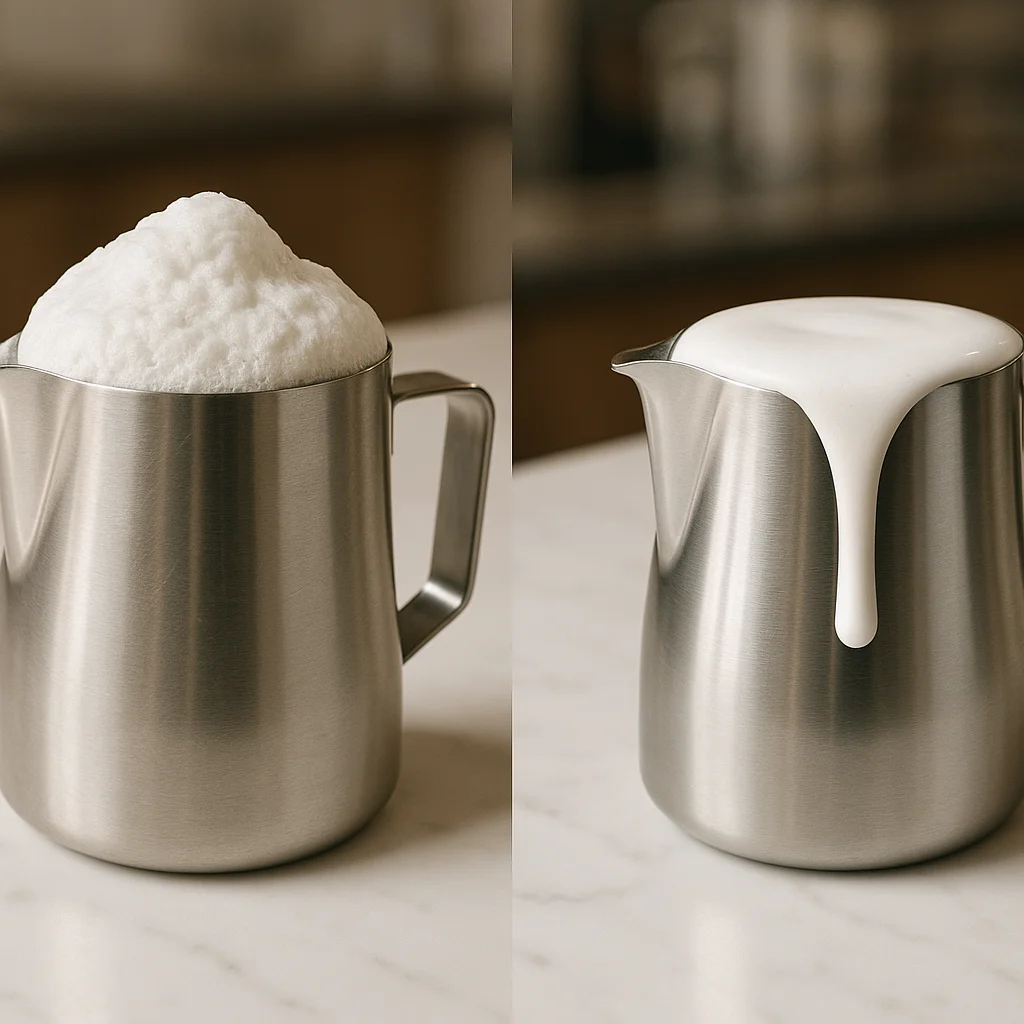
Foam That Is Too Thin or Watery
At the opposite end of the spectrum, thin foam pours like plain milk with almost no body. It sinks into the espresso immediately, producing faint, washed-out patterns or no visible art at all. The surface of the drink looks flat and dark rather than creamy and marbled.
This means not enough air was introduced during stretching. The milk was heated and vortexed, but the protein matrix had almost nothing to work with — no bubbles to stabilize, no structure to build.
To fix this:
- Listen for the hiss. If you hear no distinct paper-tearing or chirping sound in the first few seconds, the tip is too deeply submerged. Raise it toward the surface until you catch that characteristic sound.
- Start with colder milk. Milk fresh from refrigeration at around 3–5°C gives you a longer stretching window before proteins begin to denature and lose their foaming capacity. The colder the starting temperature, the more time you have to build structure. The Milk Chemistry page explains why temperature matters so much to protein behavior.
- Check your milk’s protein content. Some milks — particularly certain plant-based alternatives and ultra-filtered varieties — simply lack the protein concentration to build substantial foam. The Plant-Based Milk Guide and Dairy Milk Comparison pages detail what to expect from different milks.
Large Visible Bubbles That Won’t Disappear
Sometimes the foam has body but is riddled with visible bubbles — scattered craters on the surface that make poured designs look pockmarked and rough. This is a polishing failure. The air was incorporated, but the vortex either was not sustained long enough or was not powerful enough to shear those larger bubbles into the microscopic scale that defines true microfoam.
A firm tap of the pitcher on the counter and a few deliberate swirls can pop surface bubbles after steaming, but this is a patch, not a cure. The real fix is a stronger, more sustained rolling vortex during the polishing phase, keeping the steam tip positioned off-center to drive consistent rotation. The Physics of Foam page goes deeper into why bubble size determines everything from stability to pour behavior.
Most foam problems fall into one of these three categories — too much structure, too little structure, or structure at the wrong scale. Diagnosing which one you are dealing with narrows the fix to a small number of specific adjustments. For a fuller understanding of what ideal foam should look and feel like before it ever meets espresso, the Microfoam Fundamentals guide is the natural companion to this page.